Published July 30, 2026 · Last updated August 27, 2026
You plugged in the extra screen and got nothing. A black panel. A floating “No Signal” box. Or a Display settings page that shows one monitor where there should be two. Here is the good news: a second monitor not detected is almost never a strange, one-off fault. It is one of a short list of boring problems. And those problems fall in a predictable order. Work them in that order and you will fix this faster than the forum thread that told you to flash your BIOS.
People lose an hour because they change three things at once. They get a picture back and never learn what was broken. This guide does the opposite. You will change one link at a time, name the guilty part, and fix that part. And if the cable or the port turns out to be the villain, the last section points you at the exact hardware that ends the problem for good.
- Windows has two built-in “look again” moves most people never try. Press Win+Ctrl+Shift+B to restart the graphics driver, and click Detect under Settings, System, Display, Multiple displays.
- Nine times out of ten the culprit is boring: the wrong Windows+P mode, a dead cable, or a port that never carried video. Chase those before drivers.
- The fastest diagnosis is the three-swap test. Change one thing at a time, cable then port then source. The swap that brings the picture back names the guilty part.
- A cheap HDMI cable can carry 1080p fine and go black the moment you ask for 4K or a high refresh rate. Bandwidth is a real, invisible cause.
- Not every USB-C port sends video, and not every port on your PC talks to the GPU that is actually working. Where you plug in matters as much as what you plug in.
- If the screen went missing right after a Windows update, suspect the graphics driver, not the monitor.
Run the diagnosis first, and if it lands on hardware rather than a setting, which part do you actually need to buy?
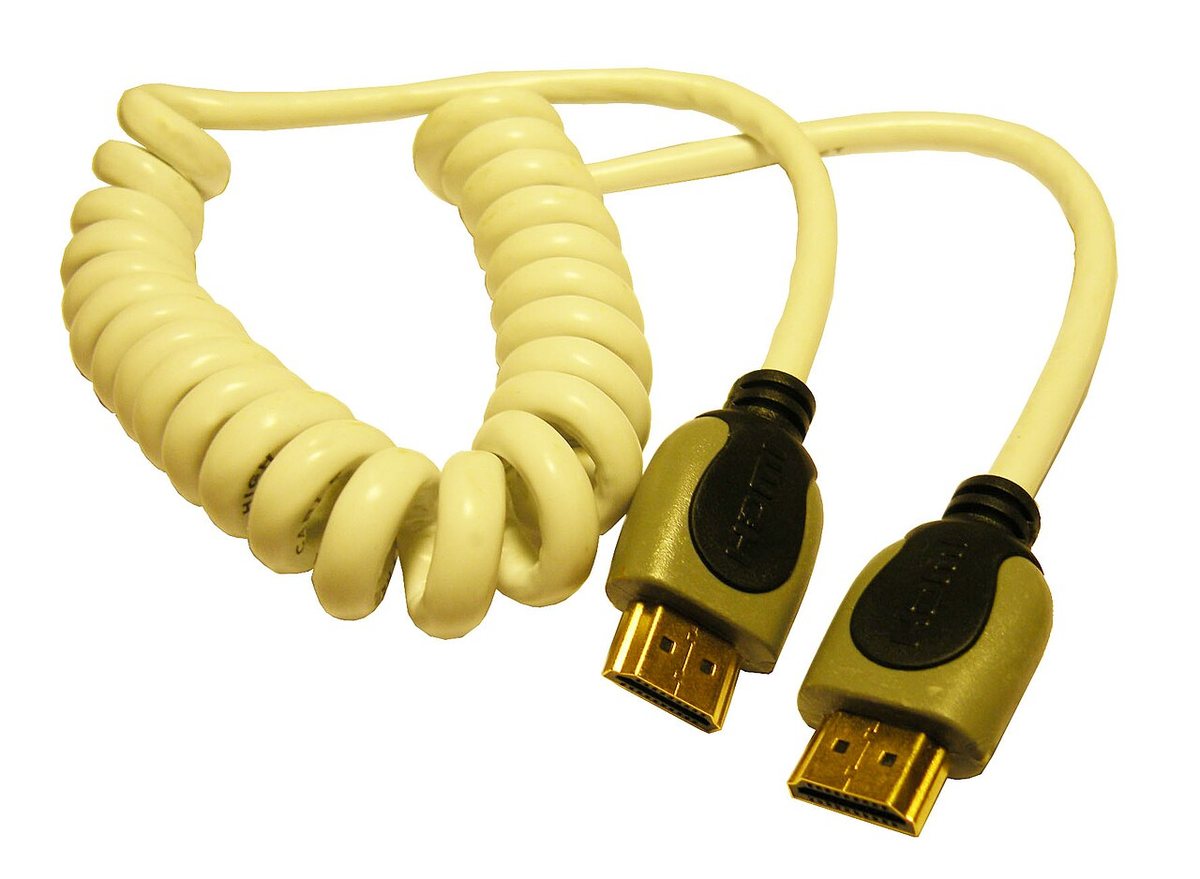
★ Your pick: Certified Ultra High Speed HDMI Cable
A real 48 Gbps cable ends the “works at 1080p, dead at 4K” dropout for good
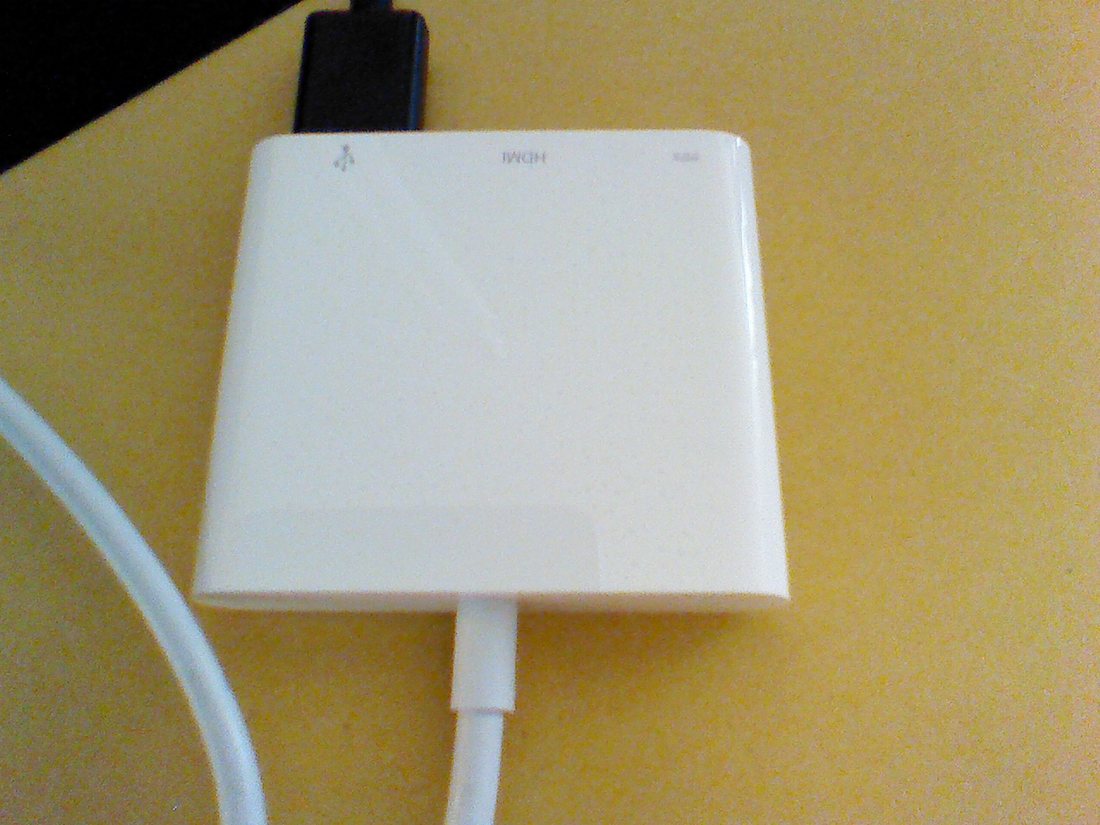
★ Your pick: USB-C to HDMI Adapter
Turns a video-capable USB-C port into a normal HDMI output, but check for the “D” logo first
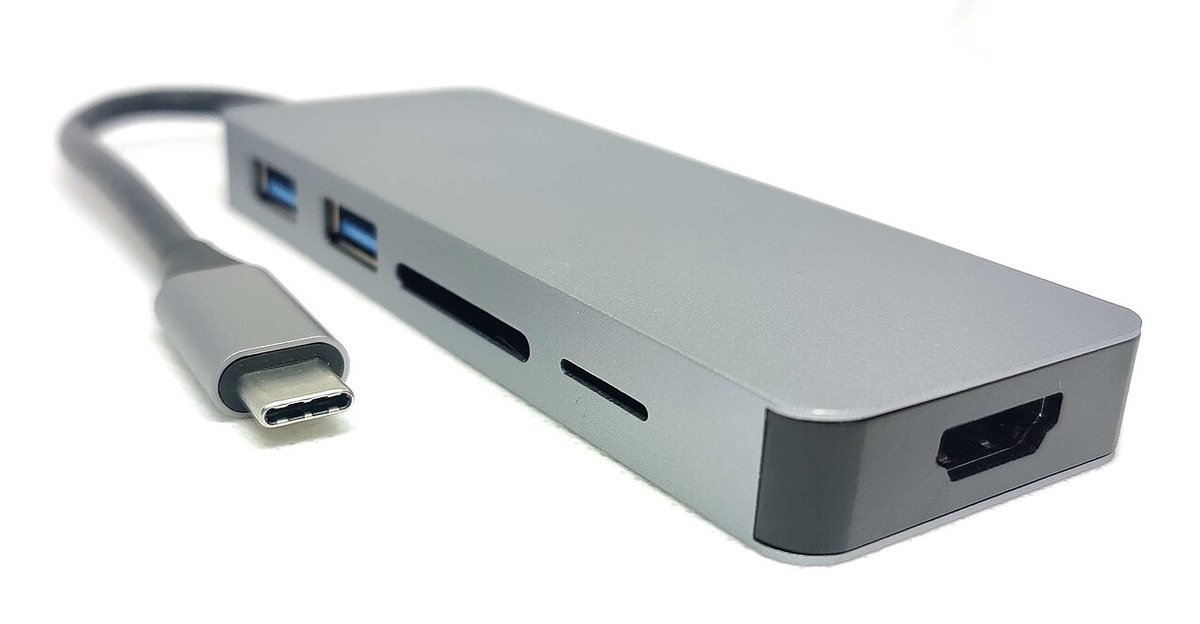
★ Your pick: USB-C Docking Station
One cable runs both screens plus power, and a powered dock stops the starved-hub dropouts
👑 Our Top Pick — Best Overall Value
Certified Ultra High Speed HDMI Cable
The cheapest fix and the most common culprit, so start here if your screen only goes black at 4K or a high refresh rate
Opens on our Top Pick. Tap an option to see the best match for you.
Start With the 30-Second Version Before Unplugging Anything
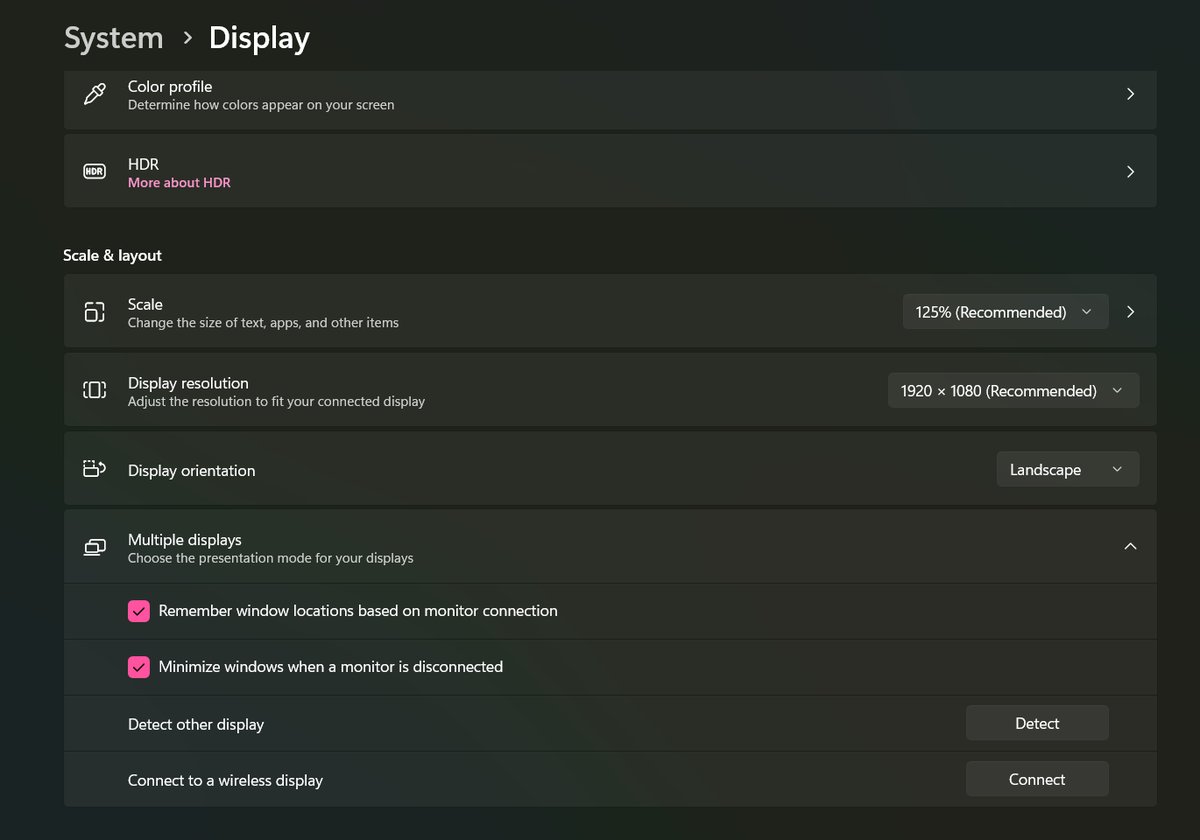
Most of these cases are solved before you ever crawl under the desk. The 2nd monitor is usually working fine. Windows is simply pointing the picture somewhere else, or its driver has stalled. Three free moves catch the majority of “missing” monitors. Run them from the top and stop the moment your screen lights up.
- Press Win+Ctrl+Shift+B first. Hold the Windows key, Ctrl, and Shift, then tap B. The screen blinks, you hear a short beep, and Windows restarts the graphics driver. It takes about two seconds and closes nothing. Microsoft lists this combo on its own keyboard shortcuts page as the wake-up move for a blank or black screen. A stalled driver is exactly the kind of fault it clears, and there is zero risk in trying it.
- Press Windows+P and pick “Extend.” A laptop that just came off a projector or a TV can be stuck on “PC screen only.” That mode blacks out every external display on purpose.
- Click Detect. Open Settings, then System, then Display, expand Multiple displays, and click Detect. This forces Windows to re-scan its ports. On Windows 10, right-click the desktop, choose Display settings, and scroll down; the Detect button sits right on the page.
- Only then touch hardware. Cable swaps, port swaps, and driver reinstalls cost real time, so they come last.
The order matters as much as the steps. The single biggest mistake in every “help, my second monitor not detected” thread is someone starting at step five.
Tip: Win+Ctrl+Shift+B is safe to press even mid-game or mid-meeting. It restarts only the graphics driver, never your apps, so nothing closes and nothing is lost.
Run the Three-Swap Isolation Test to Name the Culprit
Here is the mindset that separates a five-minute fix from a lost afternoon. A monitor signal travels through a chain: the graphics card, the port, the cable, the monitor’s input, and the panel itself. When the picture fails, the fault sits in exactly one link. Your whole job is to find which one. You do that by changing a single variable at a time and watching what happens.
Swap One Tests the Cable First
The cable is the cheapest part in the chain and the most common hardware failure, so it goes first. Cables get crushed under desk legs, yanked out at an angle, and slowly worked loose. Grab a different cable you know works, from another monitor or TV, and use it. If the second screen lights up, you are done, and you never needed a driver. No spare? Then unplug both ends and push them back in firmly. HDMI and DisplayPort plugs need a real, seated click. A half-inserted plug reads exactly like a broken one.
Swap Two Tests the Port and the Input
If a known-good cable still gives you nothing, keep the cable and change the port instead. Most graphics cards have several outputs, and a monitor usually has two or three inputs. Move the cable to a different output on the PC and a different input on the monitor. Then press the monitor’s own physical “Source” or “Input” button, and make sure it points at the socket you actually used. This catches a shocking number of people. A monitor sitting on the wrong input shows “No Signal” while the computer is doing everything right.
Swap Three Tests the Source Itself
If a good cable in a good port still shows nothing, take the monitor to a different source. Plug it into a second computer, a laptop, or a game console. This is the swap nobody wants to do, and the one that ends the guessing. If the monitor works on another device, the problem lives in your PC’s settings or its graphics driver. The next sections are for you. If the monitor stays black on everything, the monitor itself has failed. No amount of Windows tinkering will save it.
Caveat: Change one thing per swap, never two. If you replace the cable and move the port in the same breath, a returning picture teaches you nothing. The flaky part is still in the chain, waiting to act up again.
Make Windows Look Again With Detect and Windows+P
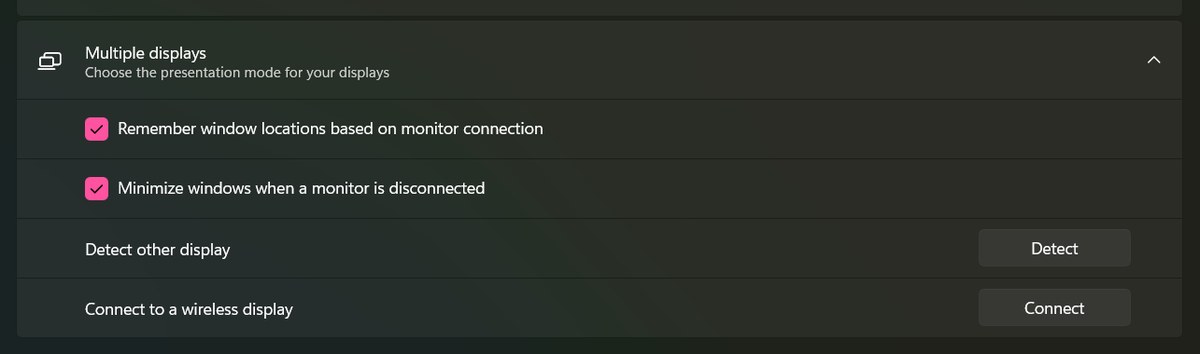
Sometimes every physical link is fine and Windows simply has not noticed the new arrival. Or it noticed, then shoved the picture onto a screen that is not there. This is a software miss, and it has a built-in cure that thousands of people never find.
Start with the projection modes. Pressing Windows+P slides out four choices, and two of them make a healthy monitor look dead. “PC screen only” lights up just your main display. “Second screen only” does the reverse and blacks out your laptop panel. “Duplicate” mirrors one image onto both. “Extend” gives you a real, roomier desktop across both screens. It is almost always the one you want.
If the mode is right and the screen is still missing, force a fresh scan. Open Settings, then System, then Display, expand Multiple displays, and click Detect. Microsoft’s own wording is blunt: if you connected another display and it is not showing in Settings, this button tells Windows to go re-poll the ports. It is the software version of knocking on the door again. It revives displays that a sleep-wake cycle or a hot-plug left in limbo. You can read the exact steps on Microsoft’s multiple-monitors support page. On Windows 10, the same button lives at Settings, System, Display, under the Multiple displays heading, with no drop-down to expand.
Note: If the 2nd monitor appears in Display settings as a numbered box but stays black, that is a different problem from a truly undetected screen. Windows sees it, so the cable and port are fine. Your fight is now with resolution, refresh rate, or the driver, covered just below.
The Cable Problems the Forums Never Explain
This is where most guides go quiet, and it is why a monitor can connect one day and go black the next. A video cable is not a simple wire that either works or does not. It is a pipe with a fixed width. Each cable standard can only carry so much data per second. Ask the pipe for more than it can move, and the monitor does not show a fuzzy picture. It shows nothing at all, exactly like a dead cable.
Resolution and refresh rate are what fill that pipe. A 1080p screen at 60Hz barely sips bandwidth, so almost any cable carries it. A 4K monitor at 144Hz is a torrent of data. A cheap “HDMI” cable from a drawer may simply not keep up. The result looks like a detection failure but is really a bandwidth failure. This is why a monitor sometimes works at a low resolution, then blacks out the instant you bump it to native 4K or crank the refresh rate.
Prove it in two minutes. If Windows still lists the screen but the picture is black or keeps dropping, click that display’s numbered box at the top of the Display page first. Then:
- Drop the resolution to 1920 × 1080. In Settings, System, Display, set “Display resolution” to 1920 × 1080. On Windows 10 the control sits on the same page.
- Drop the refresh rate to 60 Hz. Go to Advanced display and set “Choose a refresh rate” to 60 Hz. On Windows 10, open Advanced display settings from the bottom of the Display page.
- Read the verdict. If the screen holds steady at 1080p and 60Hz but dies at its native settings, the cable is your bottleneck. Replace the cable. Do not reinstall a thing.
The fix is to match the cable to the job. For a high-refresh 4K display you want an Ultra High Speed HDMI cable, certified to carry 48 Gbps, or a proper DisplayPort cable. The certification is not marketing fluff. The HDMI Forum’s Ultra High Speed cable program exists precisely because so many cables sold as “4K” cannot actually sustain it.
The catch: A shorter cable is not just tidier. It is more reliable at high bandwidth. Passive HDMI and DisplayPort cables lose signal over distance. A 25-foot bargain cable is far likelier to give you a “detected, then gone” second screen than a 6-foot certified one.
Not Every USB-C Port Actually Sends Video
Laptops muddied this badly. A USB-C port is a shape, not a promise. Only some USB-C ports can output a video signal. The feature that lets them do it is called DisplayPort Alt Mode. A port without it moves data and power only. It will never drive a monitor, no matter what you plug in.
Look closely at the port. Makers stamp a tiny DisplayPort “D” logo, or a Thunderbolt lightning bolt, next to a USB-C port that carries video. A bare USB-C port with no mark, or only an “SS” SuperSpeed logo, is very often data-only. If you have been jamming a USB-C-to-HDMI adapter into a port that cannot output a picture, the monitor was never going to appear. The adapter was never the problem. VESA’s DisplayPort Alt Mode overview explains what a USB-C port has to support to send video at all.
One more thing on thin laptops: often only one of two identical-looking USB-C ports supports video. If your adapter does nothing, try the other USB-C port before you blame the adapter or the cable. That swap is free, and it fixes this more often than you would guess.
Update, Roll Back, or Reinstall the Graphics Driver
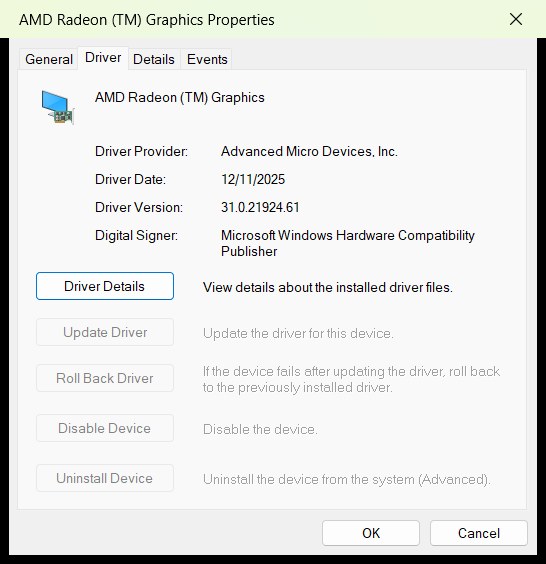
If the monitor works on another computer, and every cable and port checks out, the fault has moved into software. The graphics driver is the prime suspect. The driver is the translator between Windows and your graphics hardware. When it is broken, stale, or replaced by a generic stand-in, multi-monitor support is one of the first things to break.
Get the current driver straight from the source: NVIDIA, AMD, or Intel, through their own app or download page. Do not install a random “driver updater” tool from a search ad. That is a genuine trap. Those tools repackage the same free first-party file, often an older version, wrapped in nagware. The real fix is a clean, current driver from the company that made your graphics chip.
It Stopped Working Right After a Windows Update
This is common enough to deserve its own section. A Windows feature update can wipe out your proper graphics driver and drop in the Microsoft Basic Display Adapter. That fallback keeps one screen alive and cannot run a second display. So the machine boots, your main monitor looks normal, and the 2nd monitor has silently vanished. An update changed the driver underneath you.
The cure is to put the real driver back. Reinstall it from NVIDIA, AMD, or Intel. Or roll back: open Device Manager, expand Display adapters, double-click your graphics device, open the Driver tab, and click Roll Back Driver. That returns you to the version that worked yesterday. The path is identical on Windows 10 and Windows 11. If the button is greyed out, Windows has no older driver stored, so reinstall from the maker instead. If Windows keeps re-breaking it, your update history shows what changed and when.
The Wrong GPU Port Can Hide Your 2nd Monitor
Here is a cause almost nobody checks: the port you picked may not talk to the graphics chip that is doing the work. Many computers carry two sets of video wiring. Plug into the wrong set and you get a black screen with completely healthy hardware.
On Laptops, Two Identical Ports Can Feed Two Different GPUs
Gaming and workstation laptops usually carry two graphics chips. There is a power-sipping one built into the CPU, and a powerful dedicated card. Laptop makers wire the video ports to whichever chip they choose. One HDMI port may route through the integrated chip. A USB-C port may route through the dedicated card. Nothing on the case tells you which is which. If one chip is disabled, asleep, or mid-driver-crash, its ports go dark while the other chip’s ports work fine. So before you blame the monitor, try every video-capable port on the laptop, one by one. If the 2nd monitor appears on one port and not another, you have found your answer, and your spec sheet or maker’s support page will confirm the routing.
On Desktops, the Motherboard Port Is Often a Dead End
Desktop towers with a graphics card carry two rows of video ports. The motherboard’s ports, up near the USB cluster, connect to the CPU’s built-in graphics. The graphics card’s ports sit lower, on the card itself. When a discrete card is installed, many systems switch the CPU’s graphics off. The motherboard ports then output nothing at all. They look perfectly normal and they are dead ends. It is one of the most common mistakes in PC building, and it looks exactly like a broken monitor. The rule is simple: if you have a graphics card, both monitors plug into the card, not the motherboard. Only move to the motherboard port if your card is out of outputs and your CPU’s graphics are enabled in the BIOS.
HDMI Versus DisplayPort and Which One to Trust
When you do get down to the ports, it helps to know what you are looking at. A modern desktop graphics card usually offers a mix of HDMI and DisplayPort outputs. Both carry video, but they are not interchangeable in every situation.
For a PC monitor, DisplayPort is usually the better bet. It tends to carry higher refresh rates and resolutions than the equivalent HDMI generation. It handles daisy-chained monitors. And it is less fussy than HDMI’s handshake with TVs. HDMI is the right call for a television, or for a device that only has HDMI inputs. If your card has both, and one output refuses to detect the monitor, moving to the other type is a legitimate thirty-second test, not a workaround. This same “power is there but nothing happens” logic shows up elsewhere too. If a laptop is the machine in question, our guide to a laptop that is plugged in but not charging walks the same cheapest-first path for a different symptom.
One clarification, because it trips people up: a monitor that shows “No Signal” is powered on but receiving nothing on the selected input. That is a different failure from a monitor Windows never lists at all. A TV showing “No Signal” usually comes down to an HDMI handshake or input-source issue, not a Windows detection problem.
Docking Stations and Laptops Have Their Own Traps
If your second monitor plugs into a dock rather than straight into the computer, you have added another link to the chain. Docks bring failure modes of their own. This is one of the most common places a 2nd monitor goes undetected on a laptop.
Start with power and seating. A laptop that is not fully seated on a mechanical dock will drop external video first. So will a USB-C dock that is not getting enough power from its own adapter. Reseat the laptop. Then make sure the dock’s power brick is plugged in, not just the laptop’s.
Then consider how the dock creates its video. Some docks output video natively through DisplayPort Alt Mode. Others use a DisplayLink chip that pushes video over plain USB. DisplayLink docks need their own driver installed. Without it, the attached monitors simply never appear. If your dock came with software, or lists DisplayLink on the box, install that driver before you call the dock faulty. Finally, the closed-lid trap: if the laptop sleeps when the lid closes, docking it shut can put the whole machine to sleep instead of driving the external screens.
Warning: Cheap unpowered USB-C hubs are a frequent cause of a monitor that works for a minute, then drops. Driving a display, charging the laptop, and running USB devices can starve a bus-powered hub. A dock with its own power supply is the reliable choice for a permanent two-monitor desk.
If You’d Rather Fix It With the Right Hardware
Sometimes the diagnosis lands on a part you need to replace: a cable that cannot carry your resolution, a laptop that needs a proper adapter, or a desk that needs a real dock. The three products below solve the hardware causes described above. Match one to your actual problem rather than buying all three.
Disclosure: TechDaily is reader-supported. If you buy through the links below we may earn a small affiliate commission, at no extra cost to you. We only recommend gear that fixes the problem this article diagnoses.
1. A Certified Ultra High Speed HDMI Cable
48 GbpsHDMI Forum certified4K120 and 8K60
If your second monitor only goes black at its full resolution or refresh rate, the cable is your bottleneck. A genuine Ultra High Speed HDMI cable is certified to carry 48 Gbps. That covers 4K at 120Hz or 8K at 60Hz, and it ends the “works at 1080p, dies at 4K” pattern for good. Look for the official certification label, not a listing that just says “8K” in the title. That word is unregulated, and cheap cables abuse it.
Pros
- Certified bandwidth ends resolution and refresh-rate dropouts
- Backward compatible, so it also works with older HDMI ports
- Cheapest possible fix when the cable is the fault
Cons
- Only helps if the cable was actually your bottleneck
- “8K” on the box means nothing without the certification label
- Long runs still degrade; keep it as short as practical
2. A USB-C to HDMI Adapter That Carries Video
USB-C DP Alt ModeUp to 4K at 60HzBus-powered
If your laptop only has USB-C ports, you need an adapter. But it has to ride on a port that supports DisplayPort Alt Mode, so check for the DisplayPort “D” logo first. A good USB-C-to-HDMI adapter outputs up to 4K at 60Hz from a single cable. Many add a USB-A port and passthrough charging, so one laptop port does triple duty. This is the fix when the port can output video but lacks an HDMI socket.
Pros
- Turns a video-capable USB-C port into a standard HDMI output
- Multiport versions add USB and charging on one port
- Pocketable and ideal for travel or a shared desk
Cons
- Does nothing on a data-only USB-C port with no DP logo
- Cheaper units cap out below 4K or below 60Hz
- One more connector in the chain that can work loose
3. A USB-C Docking Station for a Two-Monitor Desk
Single-cable connectionMulti-display outputPowered for stability
For a desk where you dock and undock a laptop every day, a proper docking station beats a fistful of adapters. One cable to the laptop drives your monitors, keyboard, mouse, and charging. A dock with its own power supply also avoids the starved-hub dropouts that plague cheap unpowered hubs. If your dock uses DisplayLink rather than native video, install its driver so the screens actually appear.
Pros
- One cable connects the entire desk, monitors included
- A powered dock is stable enough for an always-on setup
- Adds ports a thin laptop does not have
Cons
- DisplayLink models need a driver before monitors appear
- Overkill if you only ever run one external screen
- Confirm the dock supports your monitor count and resolution
Frequently Asked Questions
Why is my second monitor not detected even though it is plugged in?
Being plugged in is not the same as being connected. The most common reasons are a Windows+P mode set to “PC screen only,” a cable that is faulty or not fully seated, a monitor sitting on the wrong input source, or a USB-C port that cannot output video. Press Win+Ctrl+Shift+B to restart the graphics driver, then run the three-swap test to isolate the fault. Start with the free software checks before touching hardware.
How do I force Windows 11 to detect a second monitor?
Open Settings, go to System, then Display, expand the Multiple displays section, and click Detect. That button makes Windows re-scan the video ports for a display it missed. Press Windows+P and choose Extend at the same time, so Windows actually tries to use the second screen rather than mirroring or ignoring it. Win+Ctrl+Shift+B restarts the graphics driver as a final free nudge.
Is fixing a 2nd monitor any different on Windows 10?
The fix order is identical; only the navigation differs. On Windows 10, right-click the desktop and choose Display settings, and the Detect button sits directly under the Multiple displays heading, with no drop-down to expand. Win+P, Win+Ctrl+Shift+B, and the Device Manager driver rollback work exactly the same on both systems.
Why did my second monitor stop working after a Windows update?
A Windows update sometimes replaces your real graphics driver with the generic Microsoft Basic Display Adapter, which can only run one screen. Reinstall the current driver from NVIDIA, AMD, or Intel. Or open Device Manager, expand Display adapters, double-click your graphics device, open the Driver tab, and click Roll Back Driver to return to the version that worked before the update.
Can a bad HDMI cable stop a monitor from being detected?
Yes, and it is one of the most overlooked causes. A cable that carries 1080p fine can lack the bandwidth for 4K or a high refresh rate, and it goes completely black instead of showing a degraded picture. A crushed, kinked, or very long cheap cable can also fail intermittently. Swap in a known-good, and ideally certified, cable to rule this out.
Does every USB-C port support a second monitor?
No. Only USB-C ports with DisplayPort Alt Mode can output video. They are usually marked with a small DisplayPort “D” logo or a Thunderbolt bolt. A plain USB-C port with only an “SS” SuperSpeed marking is often data and power only, and no adapter will make it send a picture. On laptops with two USB-C ports, sometimes only one supports video.
My monitor says “No Signal” but Windows sees it, so what is going on?
If Windows lists the monitor in Display settings, detection worked and the failure is downstream. Suspect the wrong input selected on the monitor, a resolution or refresh rate the cable cannot carry, or a driver glitch. Press the monitor’s Source button to confirm the input, drop the resolution to 1080p at 60Hz to test, and update the driver. A television showing “No Signal” is more often an HDMI handshake or input issue than a Windows problem.
The Bottom Line
A second monitor that will not show up feels like a hardware mystery, but it rarely is. The fix is discipline, not luck. Restart the graphics driver with Win+Ctrl+Shift+B, set the display mode, press Detect. Then run the three-swap test to pin the fault on the cable, the port, or the source before you spend a dime or reinstall a thing. And check which GPU your port actually talks to, because a healthy monitor in a dead-end port stays black forever. When the diagnosis does land on hardware, the cause is usually specific and cheap to fix: a certified cable that can carry your resolution, an adapter on a USB-C port that really sends video, or a powered dock that stops starving your displays. Work the chain in order, change one thing at a time, and your desktop will finally spread across both screens the way it was supposed to.