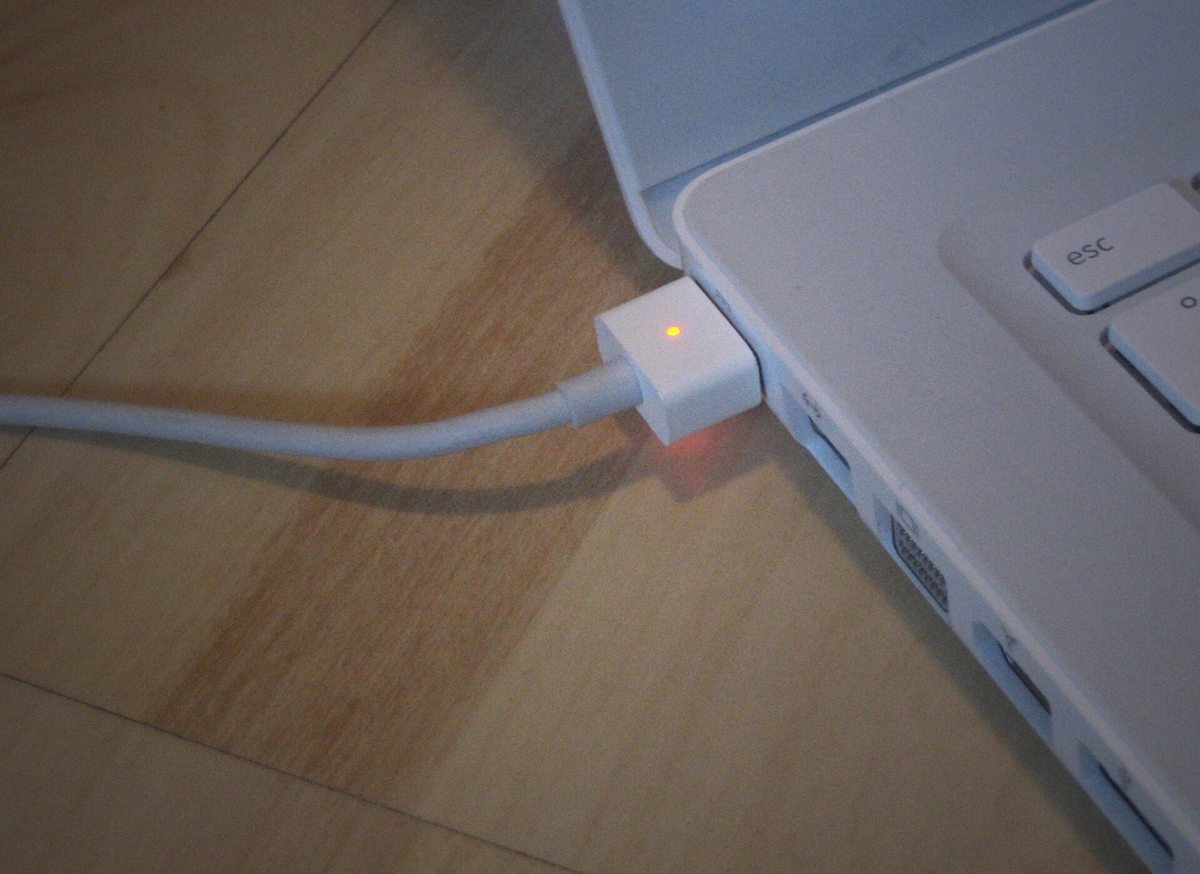
Here is the thing nobody tells you when your laptop plugged in not charging panic sets in: the battery is almost never the problem. I have opened enough machines to tell you the odds up front. Nine times out of ten, the fault is a cheap, dumb break somewhere between your wall socket and the battery, and you can find it in about ten minutes without buying a single part.
The trick is to stop guessing and start tracing. Power in a laptop travels a fixed route. It leaves the wall, passes through the adapter brick, runs down the cable, enters the charging port, gets handled by a little charging chip on the motherboard, and finally answers to the software that decides whether the battery is allowed to fill up. That is the power path. Every “not charging” fault lives at one of those stops. Test them in order, cheapest and easiest first, and you will corner the culprit instead of throwing money at a battery that was fine all along.
- Your battery is the last suspect, not the first. Most “not charging” faults are a loose plug, a weak charger, or a software setting, and those cost nothing to fix.
- Work the power path in order: wall, brick, cable, port, charging chip, then software. Skipping to the expensive end is how people waste money.
- “Not charging,” “not powering,” and “no battery detected” are three different faults with three different causes. Read the exact wording your laptop shows you.
- A weak USB-C charger will happily run your laptop but never fill the battery. Watts matter as much as the plug shape.
- The single most effective free fix on Windows is reinstalling the battery driver. On a Mac, it is checking Optimized Battery Charging before you assume the worst.
How to Read the Laptop Power Path Before You Panic
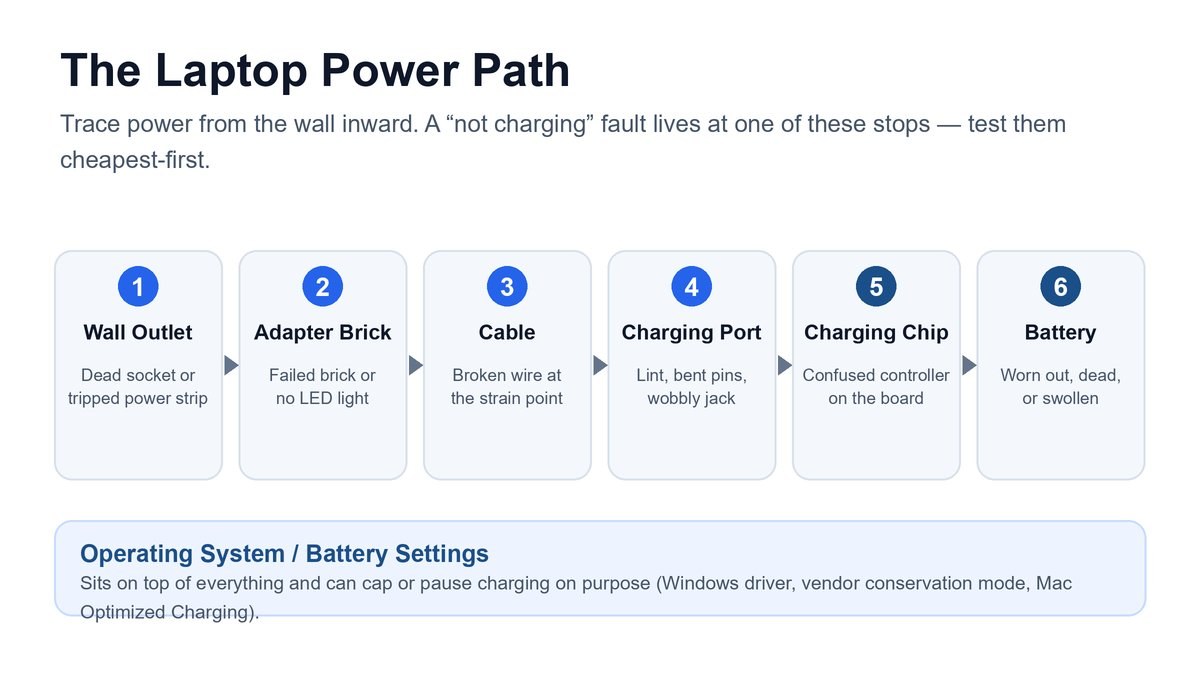
Before you touch a screwdriver or open a shopping tab, picture the route the electricity takes. It matters because a fault at each stop looks slightly different, and knowing the map tells you where to look.
Power starts at the wall outlet. From there it hits the adapter brick, that heavy box on your cable that turns high-voltage wall power into the low voltage your laptop wants. Next it runs down the cable to the charging port, the physical socket on the side of your laptop. Inside the machine, a small charging chip (engineers call it the charging IC or the embedded controller) decides how much current to push into the cells. And sitting on top of all of it is the operating system, which can quietly cap or pause charging for reasons that have nothing to do with a fault.
The reason you work this path from the wall inward is money and effort. A wall outlet costs nothing to test. A new battery costs real cash and, on a lot of modern laptops, a trip to a repair shop. So you rule out the free stuff first. It sounds obvious, yet the number one mistake I see is someone buying a battery on day one when the actual problem was a charger their dog had chewed.
Before anything else, look for a charging light near the port or on the brick. A brick with a dead LED and a laptop showing no charge light usually means the fault is upstream of the battery, out at the wall, the brick, or the cable, not inside the machine at all. That one glance often tells you which half of the path to search.
Not Charging Is Not the Same as Not Powering or No Battery Detected
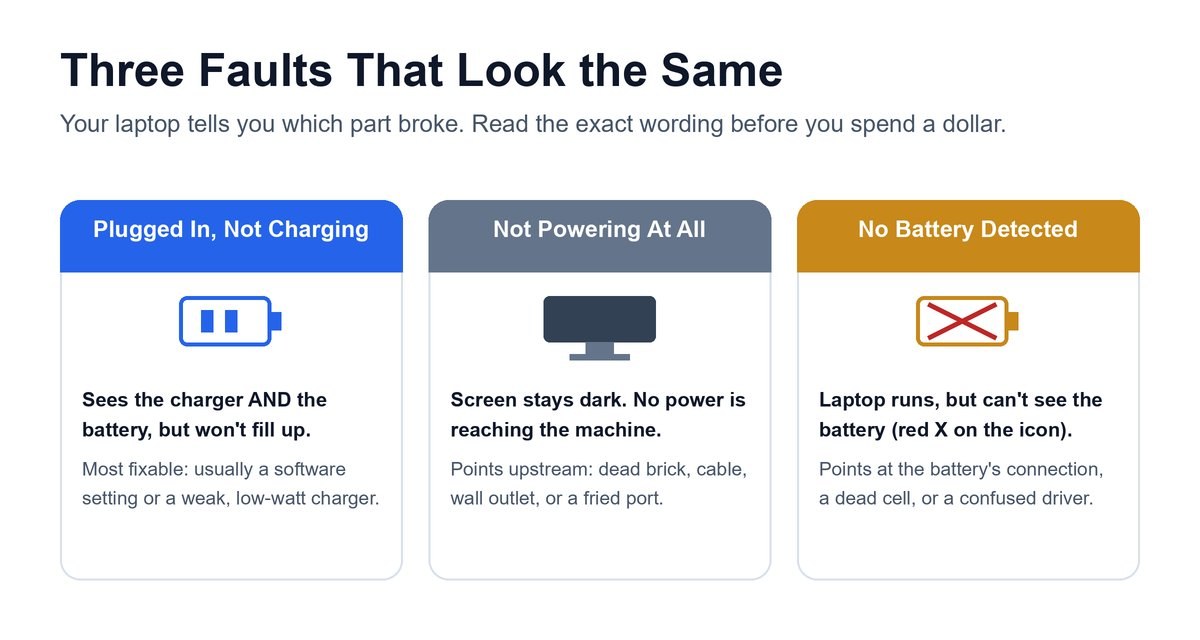
This is the insight that saves people the most time, so read it twice. Your laptop is trying to tell you exactly which part broke, and the words it uses are not interchangeable.
“Plugged in, not charging” means the laptop sees the charger and sees the battery, but the two are not talking. The machine has power. The battery just is not filling up. This is usually a software or setting problem, or a charger that is too weak to do more than keep the lights on. It is the most fixable of the three.
“Not powering” (nothing happens at all) means power is not even reaching the machine. Dead brick, dead cable, dead outlet, or a fried charging port. If your laptop is completely dark and lifeless with the charger connected, that is a power-delivery problem, and it lives out at the wall end of the path. That is a different rabbit hole, and I walk through it separately in our guide on what to do when a laptop won’t turn on.
“No battery is detected” (or a red X over the battery icon) means the charger works and the laptop runs, but the machine cannot see the battery at all. That points at the battery’s connection to the motherboard, a failed battery, or, very often, a confused driver that just needs a kick.
The difference between “not charging” and “no battery detected” tells you which repair you are facing. “Not charging” points at power and settings, which are usually free fixes. “No battery detected” points at the battery connection or the driver. So read the exact status your laptop shows before you spend a single dollar.
Start With the Dumb-but-Common Wins
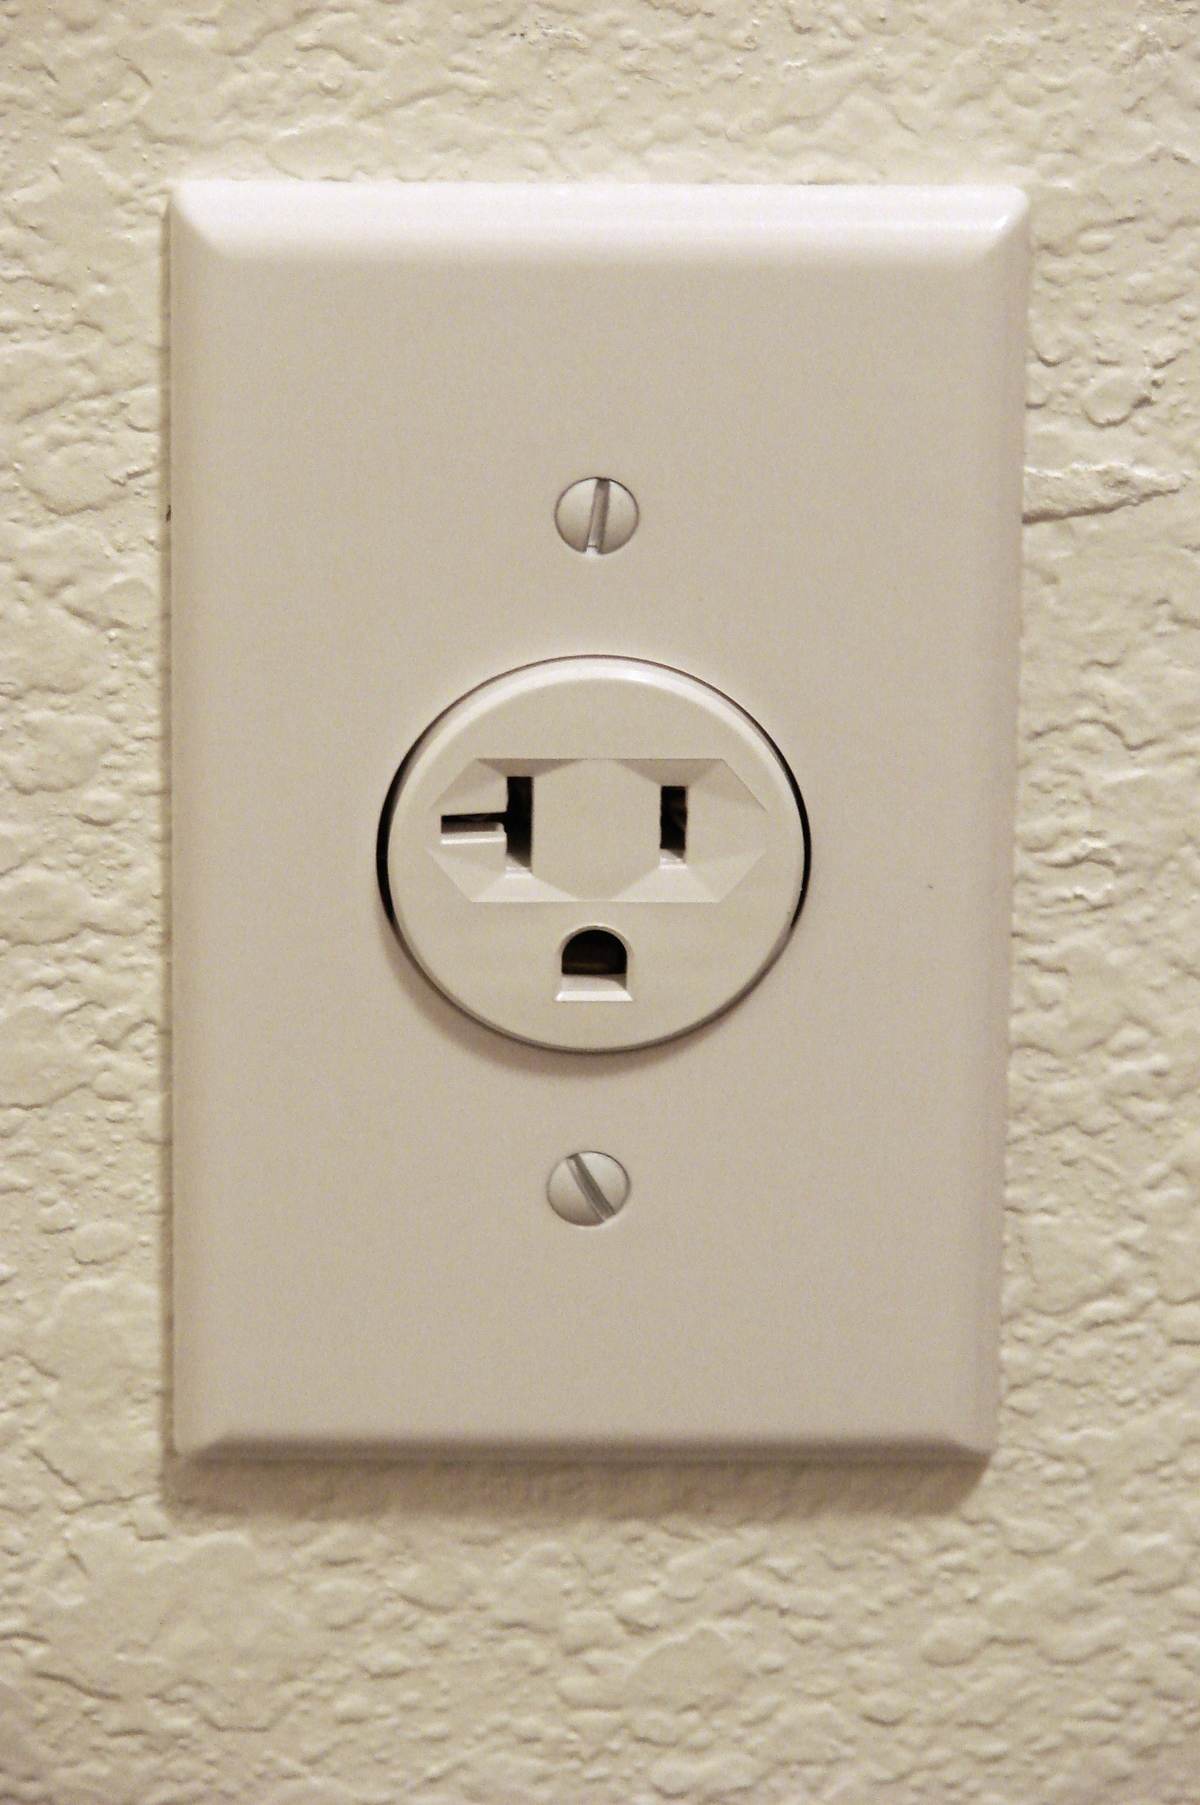
I promise you are not above these. I have watched IT pros burn an hour on a “dead” laptop that was plugged into a switched-off power strip. Rule the silly stuff out first, because it is silly stuff that gets us all.
Test the Wall Outlet and the Power Strip First
Move the charger to a different wall outlet you know works, ideally one a lamp or phone charger is happily using. Skip the power strip and surge protector entirely for this test and go straight into the wall. Surge protectors wear out and trip, and a strip with a flipped switch or a blown internal fuse will look completely dead while every light in the room stays on. This is a thirty-second test that ends a surprising number of “my laptop is broken” stories.
Reseat the Plug at Both Ends
Charging connectors loosen over time, especially if you charge in bed or on a couch where the cable gets yanked at an angle. Firmly unplug and replug the charger at the wall, at the brick if your cable splits in two, and at the laptop itself. On a USB-C laptop, push until it clicks home. A plug that is 90 percent seated will often power the machine while failing to charge it, because charging needs a cleaner, fuller connection than just keeping the lights on does.
Inspect the Cable at Its Weak Points
Run the whole cable through your fingers and look hard at two spots: where the cable meets the brick, and where it meets the connector that goes into your laptop. Those strain points are where copper wires fatigue and snap inside the rubber, invisible from the outside. Look for kinks, a bulge, a spot that bends too easily, scorch marks, or fraying. If wiggling the cable near either end makes the charge light flicker on and off, you have found your culprit. That cable is done.
Caveat: a laptop cable that charges only when you hold it at one exact angle is not a “sometimes it works” cable you can live with. A broken internal wire arcs and heats up at the break, which is a genuine fire risk. Replace it, do not baby it.
Check the Adapter or Power Brick Itself
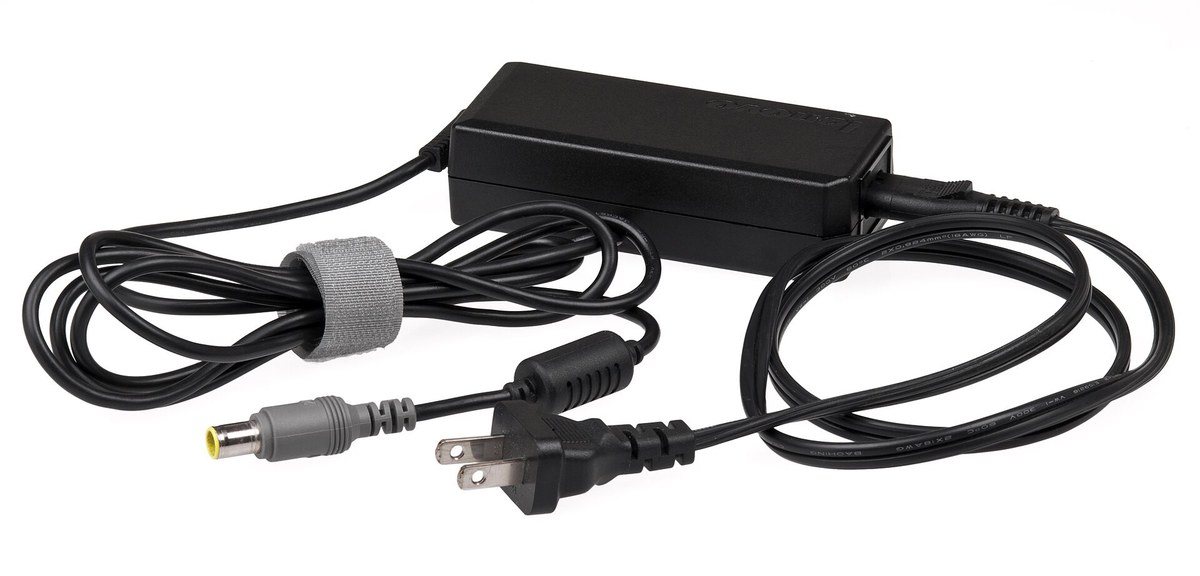
If the wall, plug, and cable are all fine, the next stop up the path is the brick. This box does real work, and it is a common failure point because it runs hot and takes the physical abuse of being dragged around in a bag.
Read the LED on the Brick
Most adapter bricks have a small light. When the charger is plugged into a live outlet, that light should be on and steady. No light at all means the brick is likely dead or is not getting power, so recheck the wall end. A light that flickers or pulses can mean the brick has detected a fault, often a short somewhere down the line or an overheating problem, and has shut down its own output to protect itself. Give a hot brick fifteen minutes to cool and test again.
Watch for a Wattage Mismatch on USB-C
Here is the modern trap, and it catches a lot of people who charge over USB-C. Not all USB-C chargers are equal, and a charger that is too weak will run your laptop while never actually charging it. Your laptop might need 65 watts, or 90, or a gaming machine might want 200-plus, but you grabbed a 30-watt phone charger or a slim travel plug. The laptop draws everything that little charger can give just to stay awake, leaving nothing left over to pour into the battery. Windows spells this out as “plugged in, charging slowly” or simply refuses to charge and the percentage crawls or drops while you work.
Check the wattage printed on your original brick (look for a number like “65W” or the volts and amps to multiply), then check the charger you are actually using. If the one in your hand is smaller, that is your answer. This is also why a USB-C dock or a random cable can quietly sabotage charging: a cheap cable may not carry enough current even from a strong charger.
The catch: a USB-C cable rated only for data or low power will bottleneck a 100-watt charger down to a trickle. For high-watt laptop charging you need a cable rated for it, usually one marked 100W or 240W or carrying an “EPR” label. The plug fitting does not guarantee the cable can carry the load.
Inspect the Charging Port for Lint and Damage
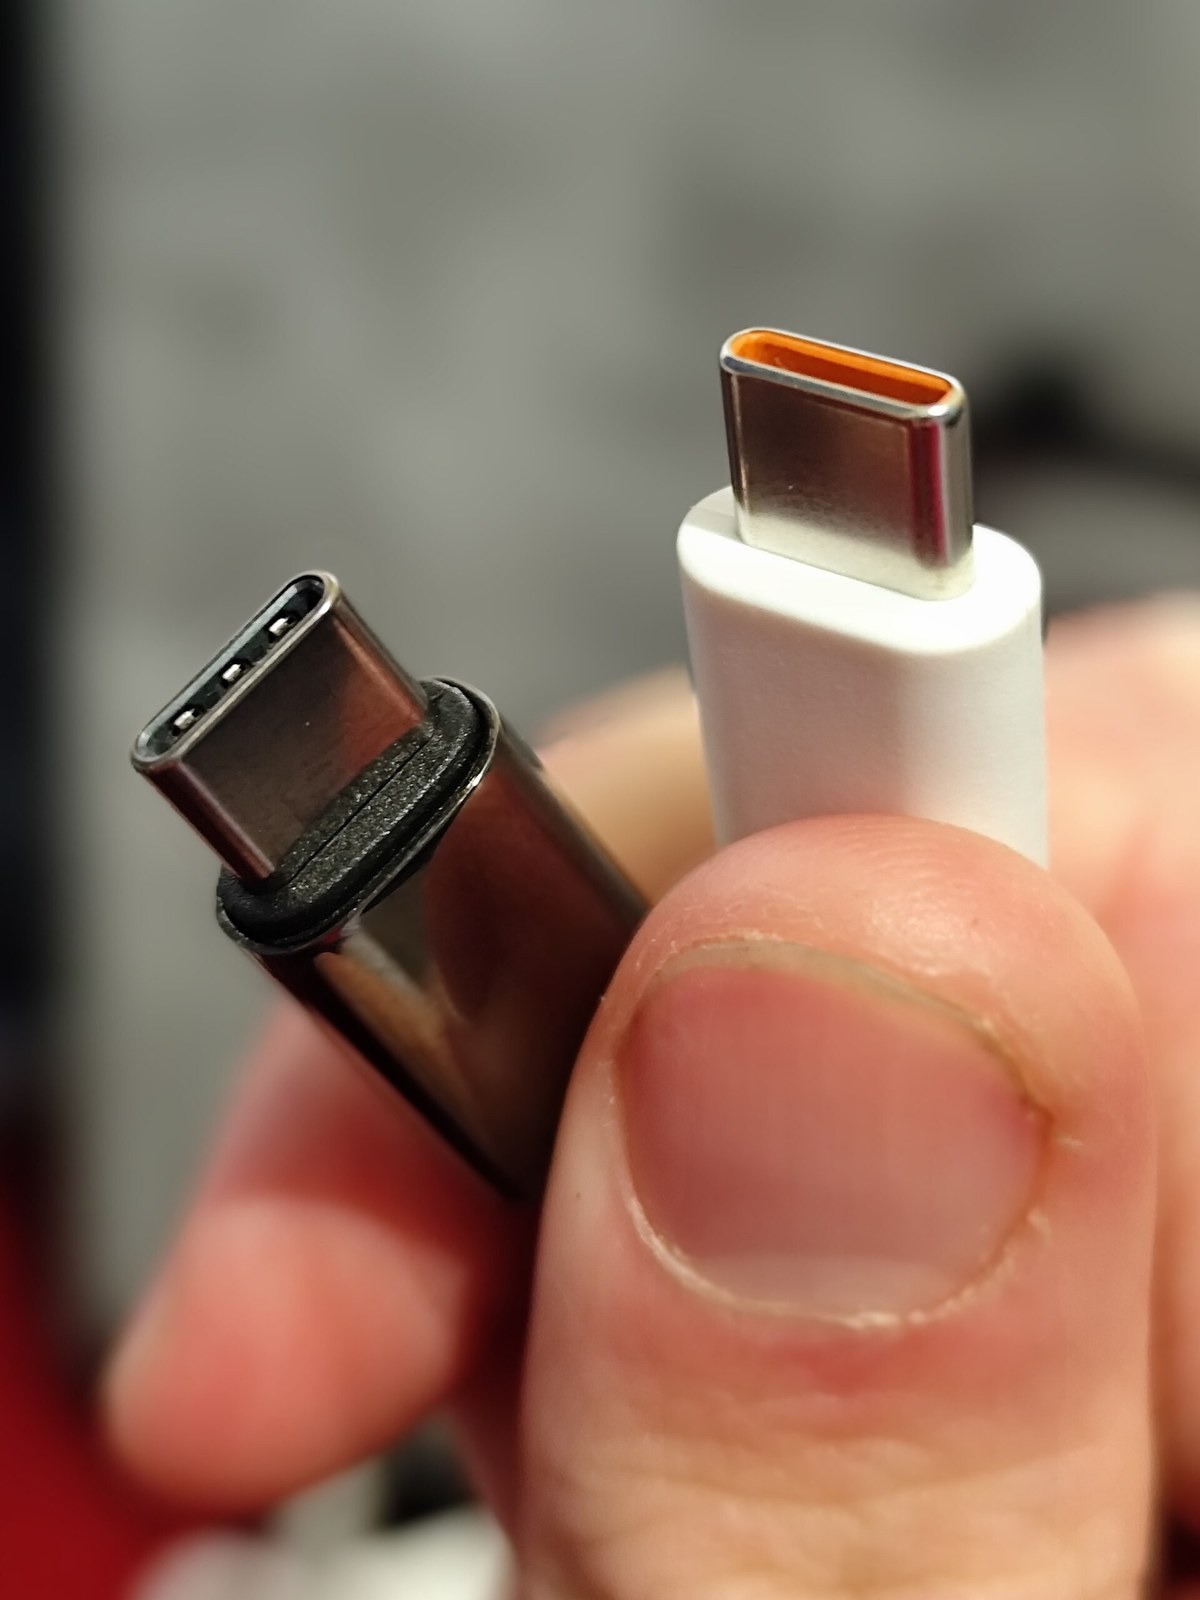
If power is definitely reaching the port but the battery still will not fill, the socket itself is the next suspect. It is a physical connector that gets plugged and unplugged thousands of times, and it lives in a machine that rides around collecting pocket lint.
Clear Lint and Debris From a USB-C Port
USB-C ports are lint magnets. Fluff packs into the bottom of the socket over months until the plug can no longer seat fully, so it powers but will not charge, or wobbles in and out of contact. Power the laptop off, shine a bright light in there, and look. Clean it with a wooden or plastic toothpick, gently scraping the packed lint out, or use a short burst of compressed air. Do not use anything metal.
Warning: never poke a metal pin, paperclip, or the tip of a knife into a charging port to clean it. The pins inside carry live power, and metal can short them or bend them, turning a free lint problem into a dead motherboard. Wood, plastic, or air only.
Check for Bent Pins or a Wobbly Barrel Jack
If your laptop uses an older round barrel plug instead of USB-C, the failure is usually mechanical wear on the jack. Years of pressure snap the solder joints that hold the jack to the motherboard, so it wiggles and only makes contact at certain angles. On USB-C, look inside the port for the little tongue in the center; if it is bent, cracked, or pushed to one side, the port is damaged. A damaged port is a board-level repair, but confirm it is really the port by testing a second known-good charger first. Do not condemn the port until the cheap suspects are all cleared.
Fix It in Software When the Hardware Checks Out
You have cleared the wall, the brick, the cable, and the port, and your laptop still says plugged in and not charging. Good news: you have arrived at the free, five-minute software fixes, and this is where a huge share of “not charging” cases actually get solved.
Reinstall the Windows Battery Driver
This is the classic fix, and it works far more often than it has any right to. Windows talks to your battery through a driver called Microsoft ACPI-Compliant Control Method Battery. When that driver gets confused, the operating system and the battery stop communicating, and you get the “plugged in, not charging” message even though every piece of hardware is fine.
To reset it, right-click the Start button and open Device Manager. Expand the Batteries section. You will see “Microsoft ACPI-Compliant Control Method Battery,” usually listed twice. Right-click each one and choose Uninstall device (this does not delete your physical battery, only the software driver). Then restart the laptop. Windows automatically reinstalls a fresh copy of the driver as it boots, and the charge light very often comes back to life. Microsoft themselves point to this driver as the thing that manages charge reporting, so reinstalling it is the sanctioned reset, not a hack. You can read the details in Microsoft’s own battery driver documentation.
Vendor Battery Conservation Modes Cap the Charge on Purpose
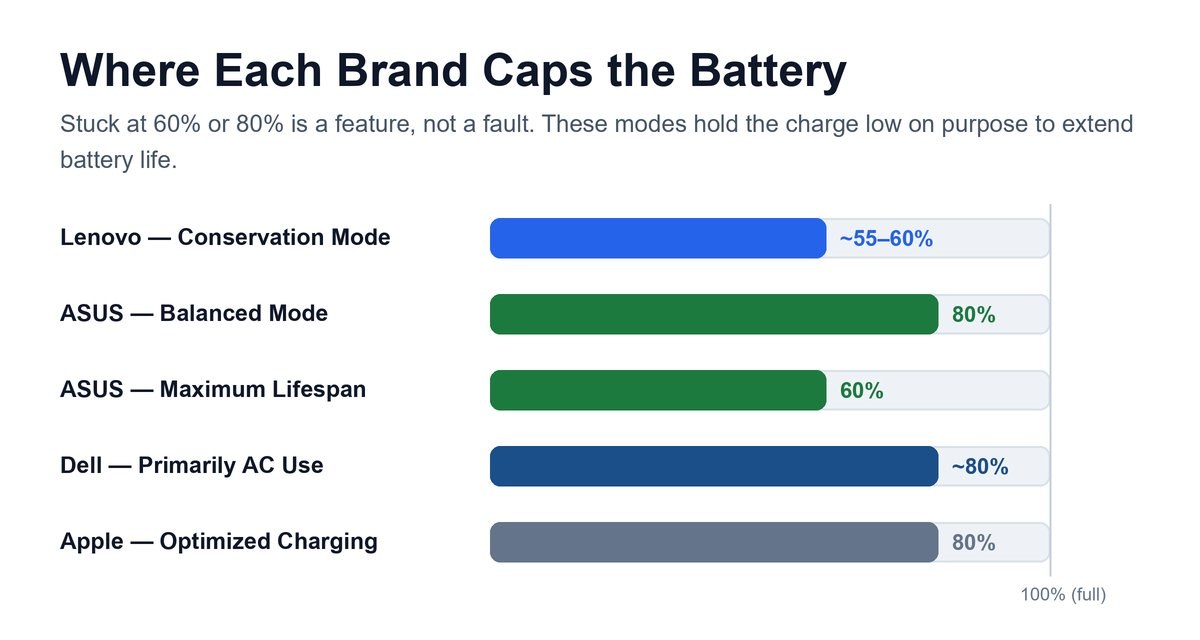
Before you declare anything broken, ask a simple question: is your battery stuck at exactly 60 percent, or 80 percent, and refusing to go higher? If so, nothing is wrong. Your laptop maker built a feature that caps the charge to make the battery last for years, and it is doing its job. People mistake this for a fault constantly.
Every major brand has its own name for it. On Lenovo, it is Conservation Mode inside the Lenovo Vantage app, which typically holds the battery around 55 to 60 percent (some models cap at 80). On ASUS, the MyASUS app offers three levels: Full capacity at 100 percent, Balanced that stops at 80 percent, and Maximum Lifespan that stops at 60 percent, as spelled out in ASUS’s own battery health guide. On Dell, the Dell Power Manager app has a “Primarily AC Use” setting that holds the charge near 80 percent for people who leave the laptop plugged in all day. Open the relevant app, find the battery or power section, and switch it to full-charge mode if you actually need 100 percent for a trip.
And these caps are genuinely good for battery lifespan, not just marketing fluff. A lithium battery ages fastest when it sits at a full 100 percent all day, so a cap at 80 percent can add years of usable life. If you mostly work plugged in at a desk, leave the cap on and enjoy the longer battery life; only switch to full charge the night before you need to run unplugged for a while.
Don’t Forget the MacBook Side of the Story

MacBooks play by slightly different rules, and Mac owners get thrown by two behaviors that look like faults but are not. If you are on a Mac, check these before you book a Genius Bar appointment.
Optimized Battery Charging Pauses at 80 Percent
macOS ships with a feature called Optimized Battery Charging turned on by default. It learns your daily routine and deliberately pauses the charge at 80 percent, only topping up to 100 right before you normally unplug, so the battery spends less time sitting full. When it does this, your menu bar says “Charging on hold” and the battery sticks at 80 percent, which sends people into a panic that their brand-new MacBook is broken.
It is not broken. It is protecting the battery exactly as designed, and Apple explains the behavior in its support note on Optimized Battery Charging. If you genuinely need a full charge right now, click the battery icon in the menu bar and choose “Charge to Full Now.” To change the default, go to System Settings, then Battery, and adjust the charging options there.
Reset the SMC on an Intel Mac
If your Mac truly refuses to charge and it is an older Intel model, resetting the System Management Controller (SMC) is the Apple equivalent of the Windows battery-driver reset. The SMC handles power and charging, and resetting it clears a stuck state. On most Intel MacBooks with the T2 chip, shut down, then hold the right Control, Option, and Shift keys and the power button together for a few seconds, release, and power on.
Keep in mind: if your Mac has an Apple Silicon chip (M1, M2, M3, or newer), there is no SMC to reset and no key combo to learn. Those functions are built into the main chip, so a normal shut down, wait thirty seconds, and restart does the same job. Do not go hunting for an SMC reset on a modern Mac; it does not exist.
When It Really Is a Dead or Dying Battery
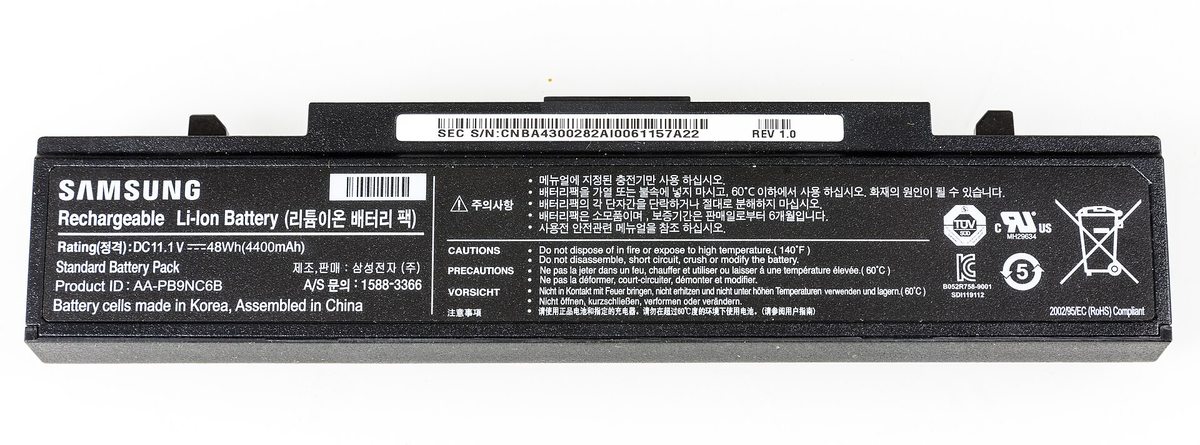
You have walked the entire path, cleared every cheap suspect, and the battery still will not take a charge or the laptop dies the instant you unplug it. Now, and only now, do we talk about the battery itself. Being honest about this stage is what separates a smart fix from a wallet-drain.
Read the Cycle Count and Wear Level
A laptop battery is rated for a set number of charge cycles, often around 500 to 1000, after which it holds noticeably less power. You can check yours. On a Mac, hold Option and click the Apple menu, choose System Information, then Power, and look at Cycle Count and Condition. On Windows, open a Command Prompt and type powercfg /batteryreport, which generates an HTML file showing “Design Capacity” versus “Full Charge Capacity.” If your full charge capacity has dropped to half the design capacity, or the cycle count is well past the rated limit, the battery is simply worn out. That is not a fault to fix; it is a part at the end of its life.
Be Honest About Repair Versus Replace
Here is the straight talk. If your laptop is three or more years old and the battery is genuinely dead, weigh the repair against the machine’s worth. A user-replaceable battery on an older laptop is a cheap, ten-minute swap and absolutely worth it. But many modern laptops, and every MacBook, glue the battery in, so replacement means a shop, a fee that can run over a hundred dollars, and some risk. If the laptop is aging and slow anyway, that money might be better aimed at a newer machine — and if you are weighing that jump, our honest look at whether you need an AI PC in 2026 or should wait covers exactly when the upgrade math works. If it is a newer, capable laptop you love, a battery replacement is a fair investment that buys years more life. A swollen battery, one that makes the case bulge or the trackpad lift, is the exception: stop using it and get it replaced immediately, because that is a safety issue, not a convenience one.
Warning: a battery that has puffed up and is pushing the laptop’s case or keyboard out of shape is dangerous. Stop charging it, stop using the laptop, and get the battery replaced or safely removed right away. A swollen lithium battery can rupture and catch fire. This is the one “not charging” cause you never ignore.
Frequently Asked Questions
Why does my laptop say “plugged in, not charging”?
It means your laptop can see both the charger and the battery, but it is choosing not to move power into the battery. That is usually a good sign, because it points at a software setting or a weak charger rather than dead hardware. The most common causes are a vendor battery-cap setting holding it at 60 or 80 percent, a confused Windows battery driver, or a charger that is too low-wattage to do more than keep the machine running. Work those three before you assume the battery is bad.
Can a laptop run with a bad battery if it’s plugged in?
Yes, most of the time. If the battery is dead but the charger and charging circuit still work, the laptop will run fine on wall power alone, exactly like a desktop. The catch is that it will shut off instantly the moment you unplug it, since there is no working battery to fall back on. That “works plugged in, dies when unplugged” behavior is actually a strong clue that the battery, not the charger, is the failed part.
Is it safe to use my laptop while it’s charging?
Completely safe. Modern laptops are built to be used while charging, and the charging circuit manages the flow so you cannot overcharge the battery by leaving it plugged in. Using it while charging will not damage anything. The only real downside is heat: gaming or heavy work while charging makes the laptop run hotter, and sustained heat is what actually ages a battery over time. If yours runs hot, our guide on how to stop a laptop from overheating will help.
Why does my laptop stop charging at exactly 80 percent?
Because you, or your laptop maker, told it to. Nearly every brand now has a battery-longevity feature that caps the charge to reduce wear: Apple’s Optimized Battery Charging, ASUS Balanced mode, Dell’s Primarily AC Use, and Lenovo Conservation Mode all park the battery around 60 to 80 percent on purpose. It is not a fault. If you need the full 100 percent for a day away from an outlet, open your laptop’s battery app or menu-bar battery icon and switch to full-charge mode.
Will any USB-C charger charge my laptop?
Not reliably. The plug will fit, but charging depends on wattage. A low-power charger, like a 20 or 30 watt phone brick, may only produce enough power to run the laptop, leaving nothing to charge the battery, so the percentage stalls or drops. Match the wattage on your laptop’s original charger, and use a cable rated to carry that power. For a laptop that wants 65 watts or more, a random thin phone cable will bottleneck even a strong charger.
How do I know if my laptop battery actually needs replacing?
Check the numbers before you buy. On Windows, run powercfg /batteryreport in Command Prompt and compare “Full Charge Capacity” to “Design Capacity.” On a Mac, look at Cycle Count and Condition under System Information. If capacity has fallen to roughly half of new, or the cycle count is well past its rating (often 500 to 1000), the battery is worn out and a replacement makes sense. If the case is bulging, replace it immediately as a safety matter, no numbers needed.
The Bottom Line
A laptop that is plugged in and not charging feels like a disaster and almost never is one. The fault is a broken link in a short, knowable chain, and if you test that chain from the wall inward, you will spend nothing to fix it far more often than you will buy a part. Start with the outlet and the plug. Rule out the brick and the cable. Clear the port. Reset the battery driver or check the vendor cap. Only when every cheap suspect is cleared do you look at the battery itself, and even then, the numbers tell you honestly whether it is worth saving. The same calm, trace-the-path habit works for a phone that won’t charge too. Panic buys batteries. Patience finds the real problem.